


Step 1 : First of all you have to create one Ec2 instance and their name is master-ansible-server.
Step 2 : In second step you can connect your ec2 instance with ec2 instance connect or you can do ssh.
Step 3 : Then you can install ansible in your ec2 instance using this command.
sudo apt-add-repository ppa:ansible/ansible
sudo apt update
sudo apt install ansible
Step 4 : using this command you can check you're ansible is install or not.
cat /etc/ansible/hosts
ansible --version
Step 5 : In this step you need to create 3 more ec2 instance and their name is ansible-target server.
Step 6 : After that you need to open your ansible host file using this comand.
sudo nano /etc/ansible/hosts
Step 7 : In this step after running above command you're ansible file is open and scroll down to the bottom and put you're public ip address of your 3 ec2 instance means ansible -target server. in this format i given below.
Note: Please put your own public ip address otherwise you will get error , if you put my public ip address.
[servers]
server1 ansible_hosts=3.80.47.171
server2 ansible_hosts=54.242.50.108
server3 ansible_hosts=3.95.67.135
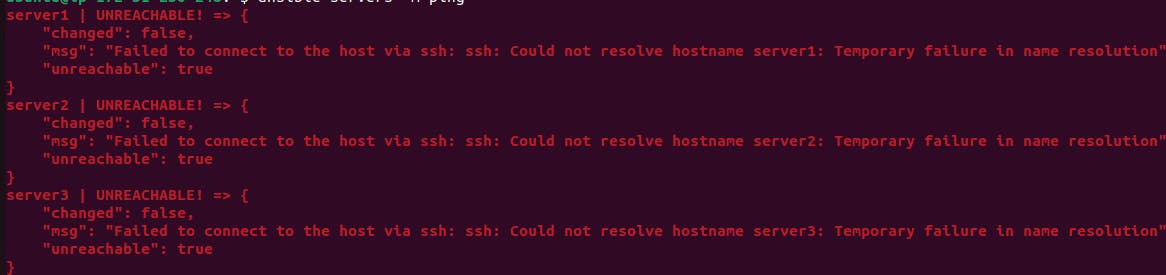
Step 8 : After that you can run below command to ping you'r target server and you will get this error.
ansible servers -m ping
Step 9 : You can use below command to copy your public key that is present in your local machine into the master ec2 instance. you can add one more terminal and go to the location where you download your public key . and you can go tho the master ec2 instance and write this command cd .ssh after that use this command pwd to know the location where you want to paste.
scp -i "devops.pem" "devops.pem" ubuntu@ec2-3-90-104-251.compute-1.amazonaws.com:/home/ubuntu/.ssh
Step 10 : After that you can use this command to go to you're ansible hosts file or a inventory file.
sudo nano /etc/ansible/hosts
Step 11 : after you write this fomate below the servers and make sure you can write you're security key name not my.
[servers:vars]
ansible_python_interpreter=/usr/bin/python3
ansible_ssh_private_key_file=/home/ubuntu/.ssh/devops.pem
Step 12 : after that you can give permission to you're .pem file using this command.and make sure you can write youre .pem file name not my file name.
chmod 600 devops.pem
Step 13 : you can use this command to ping you're target server.
ansible servers -m ping
Step 14 : If you want to check disk space of the server then you can use this command.
ansible servers -a "df -h"
Step 15 : If you want to update all you're server then you can use this command.
ansible servers -a "sudo apt update"
Step 15 : if you want to check uptime of the server.
ansible servers -a "uptime"
Step 16 : In this step you need to create folder ansible and again create another inventories folder and in that folder create nano prod_inv i(nventory file). we have create separate inventory file for production.
[servers]
prod_1 ansible_hosts=12.0.0.1

[servers:vars]
ansible_python_interpreter=/usr/bin/python3
ansible_ssh_private_key_file=/home/ubuntu/.ssh/devops.pem
Step 17 : Know you can use this command to ping you're on production inventories file.
ansible -i prod_inv servers -m ping
Step 18 : you can create another dev inventories for development.
[servers]
dev_1 ansible_hosts=12.3.0.1

[servers:vars]
ansible_python_interpreter=/usr/bin/python3
ansible_ssh_private_key_file=/home/ubuntu/.ssh/devops.pem
Step 19 : if you want to ping only dev invetories file,then you can use this command.
ansible -i dev_inv servers -m ping
Step 20 : After that you need to create playbook folder in that folder create date.yaml file.
-
 name: Date playbook
 hosts: servers
 tasks:
   - name: this will show the date
     command: date
Step 21 : You can run this playbook using this command.
ansible-playbook date.yaml
Step 22 : if you want to install nginx on all servers then you can wite ansible playbook for this.
-
 name: This playbook will install nginx
 hosts: servers
 become: yes
 tasks:
   - name: install nginx
     apt:
       name: nginx
       state: latest
   - name: start nginx
     service:
       name: nginx
       state: started
       enabled: yes
Step 23 : you can run this command to install nginx on all servers.
ansible-playbook install_nginx.yaml
Step 24 : If you want to install Docker as well as aws cli in your servers then you can write this yaml file also you can check condition as well.
-
 name: this will install based on os
 hosts: servers
 become: yes
 tasks:
   - name: install Docker
     apt:
       name: docker.io
       state: latest
   - name: install aws cli
     apt:
       name: awscli
       state: latest
     when: ansible_distribution == 'Debian' or ansible_distribution == 'Ubuntu'
Step 25: You can run this docker file using this command.
ansible-playbook conditional.yaml
Step 26 : we can deploy web page on nginx .
-
 name: this is a  simple html project
 hosts: servers
 become: yes
 tasks:
   - name: Install nginx
     apt:
       name: nginx
       state: latest

   - name: Start nginx
     service:
       name: nginx
       state: started

   - name: Deploy webpage
     copy:
       src: index.html
       dest: /var/www/html
<!DOCTYPE html>
<html>
  <head>
    <style>
      body {
        font-family: Arial, sans-serif;
        background-color: #f2f2f2;
        color: #333;
        text-align: center;
      }

      h1 {
        font-size: 36px;
        margin-top: 50px;
        color: #6130e8;
      }

      p {
        font-size: 18px;
        margin: 20px 0;
      }
    </style>
  </head>
  <body>
    <h1>Aapka Swaagat hai TrainWithShubham channel pe!</h1>
    <p>Abhi fatafat like kar do, aur Subscribe bhi</p>
  </body>
</html>
Step 27 : You can use this command to run this yaml file.
ansible-playbook deploy_webpage.yaml